Did you recently pull out your raincoat from last year only to discover that the zipper is busted? Or maybe your grandma gave you her leather coat from when she was your age, and though it’s back in style, the main zipper doesn’t work anymore. Don’t let these items gather dust in the back of your closet. Learn how to replace the zipper on your favorite jacket so you can extend the life of your most valuable clothing items.
Sometimes, a zipper seems broken when it is merely in need of a simple repair. Some people recommend a pair of pliers to pinch the tabs back onto the track. This is typically if your zipper is separating. Read here to find out if your zipper can be repaired. If you choose this route, use your pliers to pinch down on both sides of the pull until the tab runs smoothly on the track without separating. Please be aware aware, this is a temporary solution, since squeezing the slider with pliers can cause it to further wear out. Also, using pliers runs the risk of damaging the slider, or worse, ruining the zipper teeth.
If you have a broken zipper on an older coat, the pull might be stuck due to missing or broken zipper teeth or something caught in it. You used to need zipper repair parts, which involved finding the right size zipper pull tab replacement and sewing in a whole new zipper. The project required pliers, needle, and thread, and it took so much time to do that many people chose to buy new clothes rather than go through the hassle.
But don't worry, you can keep wearing your precious heirlooms and practice sustainable fashion by using a no-sew zipper replacement piece. A FixnZip zipper slider replacement fits on any size zipper, and it much cheaper than having it professionally repaired.. To use it, loosen the thumbscrew and fit the slider over one side of the track. Tighten the thumbscrew, then loosen it about a quarter of a turn so it can easily slide on the track. Next, you can insert the other side of the zipper track into the FixnZip and use your jacket. Adjust the thumbscrew as needed if the track separates. You can also check out the video below for instruction son how to repair a jacket zipper with the FixnZip. The video can be applied to zippers that are missing the zipper slider as well.
Never throw away another jacket due to a broken zipper again. You can use the FixNZip on more than jackets; it is ideal for anything that requires a zipper. Now that you know how to replace the zipper on your favorite jacket with a FixnZip, you can fix a zipper on anything from a backpack to a tent.
It can happen to anyone—while zipping your backpack, you overfill it, and the zipper splits. Or maybe your jacket zipper is splitting due to wear and tear. You don’t have to get rid of these items if you learn how to repair them. Find out why and how zippers split so that you can figure out how to fix your next broken zipper.
The fastener on your jacket, backpack, or another item may split for several reasons. There are a variety of causes for zipper failure. The most likely reason is that the slide is loose and unable to close the teeth anymore. Another possibility is that the teeth are out of line and won’t latch together.
A common solution to fixing your zipper is to use pliers to tighten the slide. If your zipper is separating, try pressing the slide together on the chain. Don’t make it so tight that it won’t glide. Make small adjustments until the slide is tight enough to fasten the teeth. This solution is often a temporary fix, and only in case of emergency. After tightening the slider, it often becomes loose again, until eventually the slider is unusable. By using pliers, you also run the risk damaging the zipper teeth (making the issue worse) or damaging the slider.
Inspect your zipper for missing or crooked teeth. Use pliers to realign any out-of-place zipper teeth. Once they are straight, try using your zipper again. Continue to align the teeth and remove any threads until the slider glides smoothly. This solution carries the same risk and warning as the previous solution. Taking a pair of pliers to your zipper can damage it, and possibly make the original problem worse.
If you can’t repair your current slider or it falls off, use an easy replacement zipper to fix your item. Attach a FixNZip to your bag or jacket to easily replace the slider and start using your item again (see video below). The FixnZip is easy to use and fits on any size zipper. Check our How To page for more information. You don't need to be a DIY expert to use the FixnZip. It goes on without tools or sewing, making it the best zipper repair kit on the market. It's also significantly cheaper than paying to have the old zipper torn out, and a new one sewn in.
Once you know why and how zippers split, you’ll know how to fix them. You can save money by mending your items rather than buying new ones when they break. A luggage or wardrobe malfunction can occur at any time. Be prepared with the right tools to solve the problem. Keep the FixnZip around to help fix all your broken zippers. Shop online to find yours today.
A broken zipper on any piece of clothing is enough to make you want to cry. However, when that piece of apparel is a dress, it's disheartening. You can utilize a jacket, coat, or possibly even a pair of pants without a zipper. But when a zipper comes loose on a dress, you'll leave it on the hanger until you repair it.
Several things can go wrong with the dress fastener, so it helps to know what you're looking for and how to fix it before you lose all hope. Use this simple guide on how to fix a dress zipper so you can use this skill for the rest of your life.
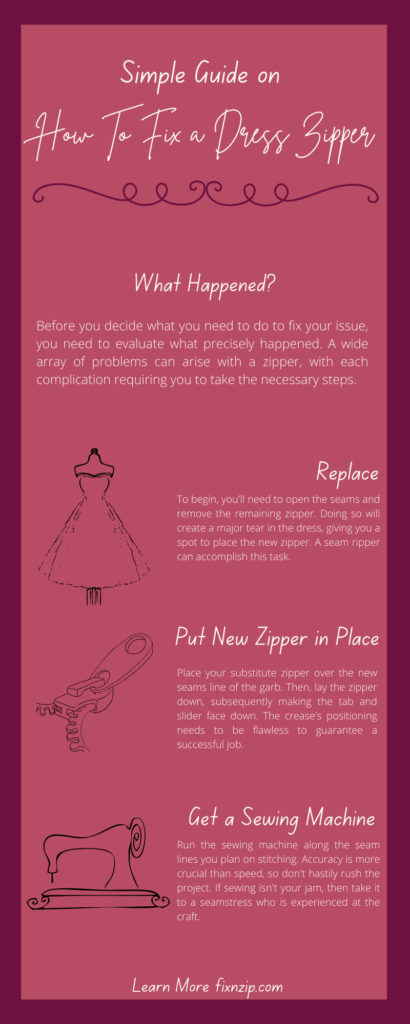
Before you decide what you need to do to fix your issue, you need to evaluate what precisely happened. A wide array of problems can arise with a zipper, with each complication requiring you to take the necessary steps. Thus, let's go over the hurdles you may need to jump through if your fastener gives you a headache.
Of all the problems a zipper can cause, this one might be the most maddening. We've all had the moment where a zipper goes up and down on the tracks, but it won't clench. The odds are this is your favorite dress because this problem occurs due to overuse. Luckily, there's no need to retire your beloved piece of attire since this problem is fixable.
Rather than taking the entire zipper apart, you should attempt to replace the slider with a zipper repair kit or a pair of pliers. Make the side gap narrow until you correct the slider, and repeat the process with the lower and upper gaps. Proceed with caution because you don't want to break the slider altogether.
The fabric that binds the zipper to the dress may tear, requiring you to follow similar steps if it doesn't close. You will need to use those pliers to make the slider wider and smoothly put the teeth on each side. Go ahead and test it out to see how things are fitting. If it's still off, you can adjust with the pliers to reattach it effectively.
When you are in a rush or feel flustered, you might hastily try and zip your dress up. The swift motion may cause the fabric to stick in the zipper's teeth. Any misalignment of the teeth can throw a zipper off, including loose hair. If it is something small like hair, you should be able to remove the hair with no issue.
It's feasible to misplace the zipper tab, despite being hard to imagine it happening. Fortunately, this mishap isn't serious enough to keep the zipper from working. Some intuition and simple resources can fix this crucial part of the zipper.
Another side effect of overusing a zipper is that it can become strangely slow. But there is an uncomplicated answer to this dilemma: lubrication. Apply Vasoline, petroleum jelly, or any comparable lubricant and rub it on the teeth. Try to certify that you aren't burying the teeth in wax, or it will move even slower.
Finally, the last and worst, that can happen with a zipper is if it loses some of its teeth. Missing teeth means you will have to replace the zipper completely. You can try any methods above, but it will be a lost cause.
To begin, you'll need to open the seams and remove the remaining zipper. Doing so will create a major tear in the dress, giving you a spot to place the new zipper. A seam ripper can accomplish this task.
Once the seam ripper does its job, you will need to apply a temporary stitch to keep everything together. Turn the garment inside out and pull the seams until they touch, and construct a quick stitch. You'll want to use a different color thread to spot and remove it quickly. Lastly, follow the crease perfectly, so the dress still looks the same.
With the right prep work complete, you can start the repair. Place your substitute zipper over the new seams line of the garb. Then, lay the zipper down, subsequently making the tab and slider face down. The crease's positioning needs to be flawless to guarantee a successful job.
Use the same strategy as the previous temporary stitch to add the new fastener. Although, you will need to lock it in place. This is helpful when using a sewing machine because everything needs to line up seamlessly.
To reinforce the new zipper permanently, get your hands on a sewing machine. Take it safe and slow and confirm the alignment before using the device. You want to guarantee that there will be no snags when the machine is running.
Run the sewing machine along the seam lines you plan on stitching. Accuracy is more crucial than speed, so don't hastily rush the project. If sewing isn't your jam, then take it to a seamstress who is experienced at the craft.
Congratulations on replacing your zipper! This is cause for a celebration, but you'll feel better once the work area is spotless. Pick up the tacking stitches and discarded threads that made their way to the floor. Once everything is pure again, you can test your craftmanship and see if the new zipper is adequate.
Hopefully, this simple guide on how to fix a dress zipper finds you well. At FixnZip, we are here to help you in your time of despair and fix that zipper before you give up on that dress and other apparel for good. Our sturdy replacement zippers will fix anything from a dress to a tent to your Jeep's canvas! Our FixnZip replacement fasteners are compatible with metal and plastic to prevent you from needing replacement zippers again. Please contact us with any questions about our products. We’re more than happy to help!
You may occasionally run into another broken zipper. No one wants to replace a new tent or favorite jacket whenever the zipper stops working. Knowing how to repair a zipper that doesn’t close the teeth can save you money and stress. Find out why zippers break and how to fix them.
Your zipper may not close if it becomes stuck. Getting your slider to move over a stuck zipper may require some maintenance. First, you should inspect the teeth to see if anything has become caught in them. Sometimes, loose threads or fabric may get into your fastener. Further, grime or dirt in the teeth can also cause an issue. But it’s possible to unstick a zipper that’s jammed. You should clean the zipper and grease the teeth so that the slider glides easily.
Your zipper may not close properly if the slider is loose. A slider may loosen over time due to wear and tear. To fix it, use pliers to pinch the slider until it’s tight enough for the zipper to work. Be careful not to pinch it too tightly, though. Otherwise, it will become stuck.
Missing or broken zipper teeth can prevent your fastener from working. In this case, you may need to replace the entire zipper with a repair kit. While you can use pliers to put bent teeth back in place, you’ll need a new chair if the teeth are altogether missing.
The most important element to any zipper is the slider. You need something to pinch the teeth together to engage the mechanism. Using your hands won’t work. If your slider breaks, it may be challenging to use it to close the teeth. Whether due to wear and tear or an accident, your slider may lose its pull. Or it may crack. While you can attach a piece of twine or rope to your slider to replace the pull, you’ll need a zipper pull replacement piece if the entire slider has become damaged.
Can your zipper be repaired? Use a FixnZip when you don’t know how to repair a zipper that doesn’t close the teeth. With this replacement piece, you use a thumbscrew to customize the tightness of the slide. Stop throwing away broken jackets and backpacks and repair them with the FixnZip.
Check out our “How To” page or the video below for more specifics on repairing zippers.
The color and quality of the fastener you place on your homemade jacket or dress suits the functionality and style. But have you considered how size affects the look of your piece? Knowing how to differentiate between zipper teeth sizes can elevate your fashion game and take your designs to new heights. Find out how to tell the difference between zipper sizes.
If you don’t know the size of a zipper, you can measure the teeth. While the fastener is closed, use a tape measure with millimeters to get the approximate measurement of the zipper.
It’s helpful to know common zipper sizes before you measure one. Teeth sizes can range from 3mm to 35mm, depending on the material. Typically, the size zipper you’re using depends on what it’s for. For instance, you’ll find smaller zippers on pillows and purses and larger ones on tents and boat covers.
By material, the most common coil zipper sizes are #4.5, #5, and #10. VISLON zippers typically come in #5, #10, and #15. Metal zippers are different because the teeth are sewn directly into the chain, so they can come in more sizes.
Determining a zipper size is essential when making or repairing clothing. If you’re looking for zipper repair parts, you may need a chain that’s wide enough to fill the gap left by your old zipper. Further, if you’re replacing the slider, you’ll need one that fits over the teeth. The FixNZip is a universal placement tab that fits over any chain.
The size of your zipper changes the function and look of your item. Larger zippers tend to be easier to use, and they look striking on jackets and handbags. Once you know how to differentiate between zipper teeth sizes, you can start experimenting with where bigger or smaller ones work best. Keep outfits practical when you utilize zippers.
Everyone uses zippers. We love them because they look good and make our lives easier. Regardless of the reason for your fascination with these fasteners, the important zipper terminology you should know will help you understand how to repair or replace one if needed.
You never know when a zipper emergency may strike. Knowledge is power, and these definitions may give you the potential you need to undertake your own sewing projects. Use these details to get started.
The slider is the piece that closes the teeth of the zipper by moving up and down the chain. Different types of sliders exist depending on the type of zipper.
The pull-tab is the most important element of the slider. It allows you to use the zipper and helps you pull the slider across the teeth.
The tape is the fabric on which the zipper sits. In most cases, the fabric is polyester, though manufacturers may use other materials.
Teeth are molded plastic or metal that links together to fasten items together. Some are individually sewn into the tape while others are made as a unit.
At the bottom and top of the tape, you’ll find a tiny piece of plastic or metal that prevents the slider from falling off the chain. These are top and bottom stops.
The pieces of fabric at the top and bottom of the zipper are known as edges or extensions. They help when sewing in a zipper.
A heat-seal patch is used to reinforce the tape. It’s a piece of laminated material at the bottom of separating zippers. It protects the bottom edge or extension.
When people talk about zipper material, they are referring to the teeth and pull-tab rather than the tape fabric. For instance, the zipper might be made of metal or plastic.
The chain refers to all parts of the zipper when both sections are brought together. When the teeth are closed, it creates a chain.
A box is used on a separating zipper—such as for jackets—and is meant to align with an insertion pin so you can zip up an item.
Depending on how your zipper was manufactured, it may include either a left or right insertion pin. Only separating zippers with boxes have this feature.
Jacket zippers are separating zippers that use a single slider, box, or insertion pin. They come apart completely.
These zippers have two pull-tabs so you can decide which section of your item is fastened. These are also known as double zippers, and you’ll often see the bottom of the zipper separate to allow room for legs.
Unlike separating zippers, these don’t open at the bottom. They have a bar that goes across the bottom to prevent the fastener from separating once the slider reaches the end.
Also known as an auto-lock slider, this feature prevents your zipper from separating unless you move the pull tab. It has a locking pin that allows it to grip the teeth so it doesn’t slide on its own.
These are the opposite of locking sliders. Non-locking types are easier to glide along the teeth. You might find them on handbags or wallets.
As the name suggests, you can’t see this type of zipper. They are designed to hide within the item they’re sewn into. The teeth coil into the fabric to hide the material. They are typically sewn under a flap of fabric to conceal them even more.
Typically used by manufacturers, continuous chains are endless zippers that you can cut to the size you desire. They don’t feature any extra elements, such as stops or boxes. This type of craft zipper is customizable.
These zippers are finished and contain all the desired components (i.e. insertion pins and stops). They are pre-cut to the desired length you need to complete a project.
Metal zippers are common, although they typically aren’t used on marine or camping gear. Since metal can rust, metal zippers aren’t the first choice for water-resistant items. Still, it’s a durable zipper material that’s often used for duffel bags, coats, and leather goods. Metal teeth are clamped directly into the fabric so they’re resistant to wear and tear.
These molded plastic fasteners are stiff and strong. The teeth are pressed right into the tape for a secure hold that makes these some of the most popular zippers available.
Small flexible coil zippers are excellent for tents, curtains, and cushions that have rounded edges. The zipper can bend, making it ideal in many situations.
The gauge size refers to the size of the teeth, and it’s measured in millimeters. You measure the size of a zipper by measure the teeth when the chain is closed. Typically, you can find the size listed on the pull tab.
Two get the width of the tape, you’ll measure each side separately. It’s important to know this measurement when sewing a zipper to a garment.
This term refers to how a zipper is made for a particular use. For instance, some are designed for fashion while others are crafted for outdoor use.
The first thing you should think of when your zipper slider breaks is the FixNZip. This universal zipper repair kit fits on fasteners of any size or material so you can use them again. Simply loosen the thumbscrew and fit the device over your zipper. Once you tighten it, you can use your zipper again.
Save this important zipper terminology to reference when you need a refresher on the different types you should know. Whether you need to repair an item or to make your own clothes, knowing more about zippers will give help you make the right decisions for your projects.

It’s October, and the weather has officially transitioned to fall here in Portland, OR. We’ve been getting beautiful sunny days here in the Northwest, but the nights have been getting noticeably colder. It’s the time of year when I actually zip up my sleeping bag when I go camping, which brings me to the topic of today’s blog post: how to fix a sleeping bag zipper.
I invested good money in my sleeping bag, because it’s one of the most important pieces of equipment I take backpacking. I need it to maintain body heat, and hopefully get a good night’s sleep in the process. It’s lightweight, comfortable, breathes well, and it keeps me warm. It wasn’t cheap either. I’ve never had a problem with the zipper on my sleeping bag (knock on wood), but I consider myself lucky because a number of my friends have run into this exact problem. So, what are your options if the zipper slider on your sleeping bag wears out or breaks? Here are a few options for how to fix your sleeping bag zipper (and of course the FixnZip® is in there).
Your first option would be to take it to a seamstress. You’ll get your sleeping bag back good as new, but it will also run you anywhere from $60-$100, depending on their pricing. This is only a viable option if you're in town and not using the bag. But what if the zipper breaks when you’re out backpacking?
McNett has a field zipper repair kit that runs about $9.95. It involves unstitching the seam, putting on a new slider, and sewing the seam back up. It includes 5 sliders, but each one fits a specific size and style (i.e. a #5 tooth and a #5 coil). This option is definitely cheaper than the seamstress, but it requires you to do the sewing, and you have to carry multiple zipper sliders for each specific size and style.
The best solution? Naturally I’m partial to this option, but the FixnZip® is great for sleeping bag zipper repair, whether you’re at home or on the trail. For sleeping bags, you can take a look at our video on how to measure zipper size, but I recommend the size Medium. It fits zipper sizes 5-8 and works on both tooth and coil zippers. It does not require tools or sewing, and takes only seconds to install, which makes it a great option for repairing zippers in the field. A single runs just $10.99, and you can order it here.
Below is a video showing Ray, our President and CEO, using the FixnZip® on his daughter’s sleeping bag.
As you can see in the video, the FixnZip® is easy to use on a sleeping bag. I highly recommend keeping a few in your first aid kit when you're backpacking, just in case the zipper goes out on any of your gear. As always, if you have any questions about this post or have a topic you would like me to cover, comment below or hit me up on Twitter or Facebook. You can also contact us here.
Jonathan
Creating your own fashion is a timeless hobby. Clothing is essential to our modern way of life, and the zipper has been part of it for more than 100 years. This simple fastener makes clothing easier to wear, but you can also use it as a fashion statement. What to know before ordering new zippers is the different sizes, materials, and functions they serve. Use this guide to figure out which one is right for your project.
Most people don’t think about the mechanics of zippers—they just use them. This expertly designed piece of engineering is crafted with custom pieces that must latch together perfectly, or the mechanism won’t work. The hook and hollow of coordinating teeth must match up to secure a strong hold. The fastener should only come undone when the slide separates the teeth.
Whether you’re inserting a new zipper or repairing one, it’s important to understand how zippers are made. Though they seem simple, this fastener that’s been in use for more than 100 years is composed of several parts, including:
Before you purchase a zipper, know your options. They come in many different sizes, materials, and colors. When choosing a zipper, consider your project. When sewing a new zipper into an item, try to match the size and material of the previous zipper. If your original zipper was weak, you might consider a stronger one.
Metal, coil, and VISLON are the most common types of zippers. VISLON are recognizable by the shape of their teeth, which are slightly triangular. Their advanced interlocking method is waterproof and ideal for marine gear. VISLON zippers may look like metal or another neutral color.
Coil zippers are flexible and made from plastic. They are the strongest type of fastener and work well on items that curve, such as backpacks, tents, and boots. With coil, a line of teeth is sewn into the tape to form the chain. They come in a myriad of colors.
On the other hand, the teeth of metal zippers are sewn separately into the tape. They are shiny and metallic. Metal zippers tend to be sturdy and tough enough for jackets, bags, and upholstery.
In addition to the material, another vital thing to understand before picking out a replacement zipper is that they come in different sizes. It’s essential to measure the width of the teeth to know the size of the fastener you’re replacing. You measure zippers in millimeters. The most common sizes are 5mm, 10mm, and 15mm.
Locking zippers contain a mechanism within the slider that holds it in place. It won’t separate unless you use the pull tab to glide the slide over the teeth. Non-locking zippers will move no matter what part of the zipper you pull on, including pulling the teeth apart.
Finished zippers are standard on jackets and include an insertion box and pin as well as top and bottom stops. These additional pieces prevent the slider from falling off the chain and allow the zipper to separate. Continuous zippers are sewn into bags and tents. They don’t come apart at the ends.
Regardless of which type of zipper you have, it may malfunction for several reasons. One of the most common causes of a broken zipper is the slider becoming stuck. If it’s stuck, don’t tug harder on the pull as you risk breaking it. The zipper may be stuck if lose threads or fabric get caught in the teeth or slide. Dirt and debris may also cause the slide to stop working.
Another common problem with zippers occurs when they separate. Sometimes zippers come undone in the center when the slider isn’t tight enough. It can also happen if something is stuck in the teeth or if the teeth are misaligned.
Keep in mind that there’s an easy way to fix your zipper when it breaks instead of buying a new one. A no-sew zipper pull tab replacement allows you to fix jackets, backpacks, and tents quickly. Stop throwing things away just because the zipper breaks when you use a no-sew device.
Whether it’s the zipper on your marine gear or your Halloween costume, you should keep it clean to ensure you can use it again year after year. To prevent having to replace your fasteners, inspect them for debris. Use a brush with fine bristles to excavate dirt. Then grease the zipper with a lubricant such as:
You should buy a new zipper if your current one is beyond repair. If your zipper is missing multiple teeth, adding a new slide might not help your situation. It’s time to purchase new zippers if your old ones are too small to clean or repair.
Get new zippers at craft stores and from online retailers. Before you make your purchase, check descriptions to ensure you’re ordering the best fastener for your project. For instance, many clothing items need long zippers, so ensure you measure accordingly. If you’re replacing one, make sure you use a sturdier material, so your jacket or backpack doesn’t break again.
Some factors to know before ordering new zippers is how to measure your zipper and what your options are. Zippers come in all sorts of different materials and sizes. If you’re repairing a broken fastener, try the FixNZip replacement zipper. This no-sew slider is a quick fix to any zipper malfunction you may come across. It just might be the last zipper you ever order.
Zipper care isn’t always on the top of our minds. You likely don’t think about your zippers until they break. If you own expensive camping gear or marine equipment, though, you know how important it is to make sure your zippers work, so you don’t have to replace your gear. Here are easy ways to extend the life of your zipper so you can keep using your favorite items.
Cleaning your zipper will help it continue working. Especially if you use any outdoor equipment, you’ll want to clean the zippers after each use. Avoid dirt and grime from clogging the teeth of your zipper by cleaning it right away. Clogged zipper teeth may prevent the slide from gliding over the chain smoothly.
To protect your zipper and keep it in good shape, you should lubricate the teeth. Many common household items make good lubricants, such as granite pencils, Windex, and lip balm. Use a lubricant on your zipper before using your outdoor gear or to improve a rigid zipper.
Zippers are made of different materials, such as plastic and metal. Some are more durable than others. If your zipper isn’t working properly, don’t tug on it harshly because you might break it. You should always inspect the zipper for damage and try to repair it. If you tug too hard, you risk causing further damage like removing the pull tab or slide.
You can extend the life of your zipper and the item it’s attached to when you learn simple repair techniques. A common cause of a stuck zipper is threads wound in the teeth. Unwind or cut away these threads to improve the use of your zipper.
For more easy ways to extend the life of your zipper, you can keep a zipper replacement kit on hand. The FixNZip fits on any size zipper to replace the tab. Find one today!
No matter the cause of zipper failure, finding out that the zipper on your favorite item is broken doesn’t have to mean throwing it away. You may be able to repair a broken zipper with the right tools. Depending on the condition of the zipper, you can perform simple tricks to get it working again. Know how to tell whether a broken zipper can be repaired to avoid replacing or throwing out items altogether.
To find out if you can repair your zipper, you must inspect the slider. Check for damage that may cause it to fall off, such as corrosion or missing sections. If your slider is irreparable, you can use a zipper pull tab replacement. Using a FixNZip is the easiest way to replace any broken zipper. You may be able to repair your broken zipper yourself, though.
If your slider is stuck, you can lubricate the teeth to help it slide better. Use a granite pencil, wax, Windex, or another common option to lubricate the zipper on the teeth and slide.
The slide on your zipper can become loose over time. You may notice this if your zipper teeth separate after you pull up the tab or if the slide jiggles on the chain. Use pilers to pinch your slider back onto the chain.
Other pieces that may be broken or missing from your zipper are the insertion box or stops. These pieces prevent the slider from falling off the chain. For instance, if you are using your jacket, and the slider comes off, you may need to replace a top or bottom stop. If you are having trouble starting your zipper, you may have a damaged pin or box that needs to be replaced.
Knowing how to tell whether a broken zipper can be repaired will save you money and stress. A zipper can break at anytime if you don’t take good care of it. Keep a FixNZip on hand for all your wardrobe malfunctions and other zipper repair needs. Shop online to find one today.